|
|
System
Using this section, you can create the following:
Screen Layout of System Users
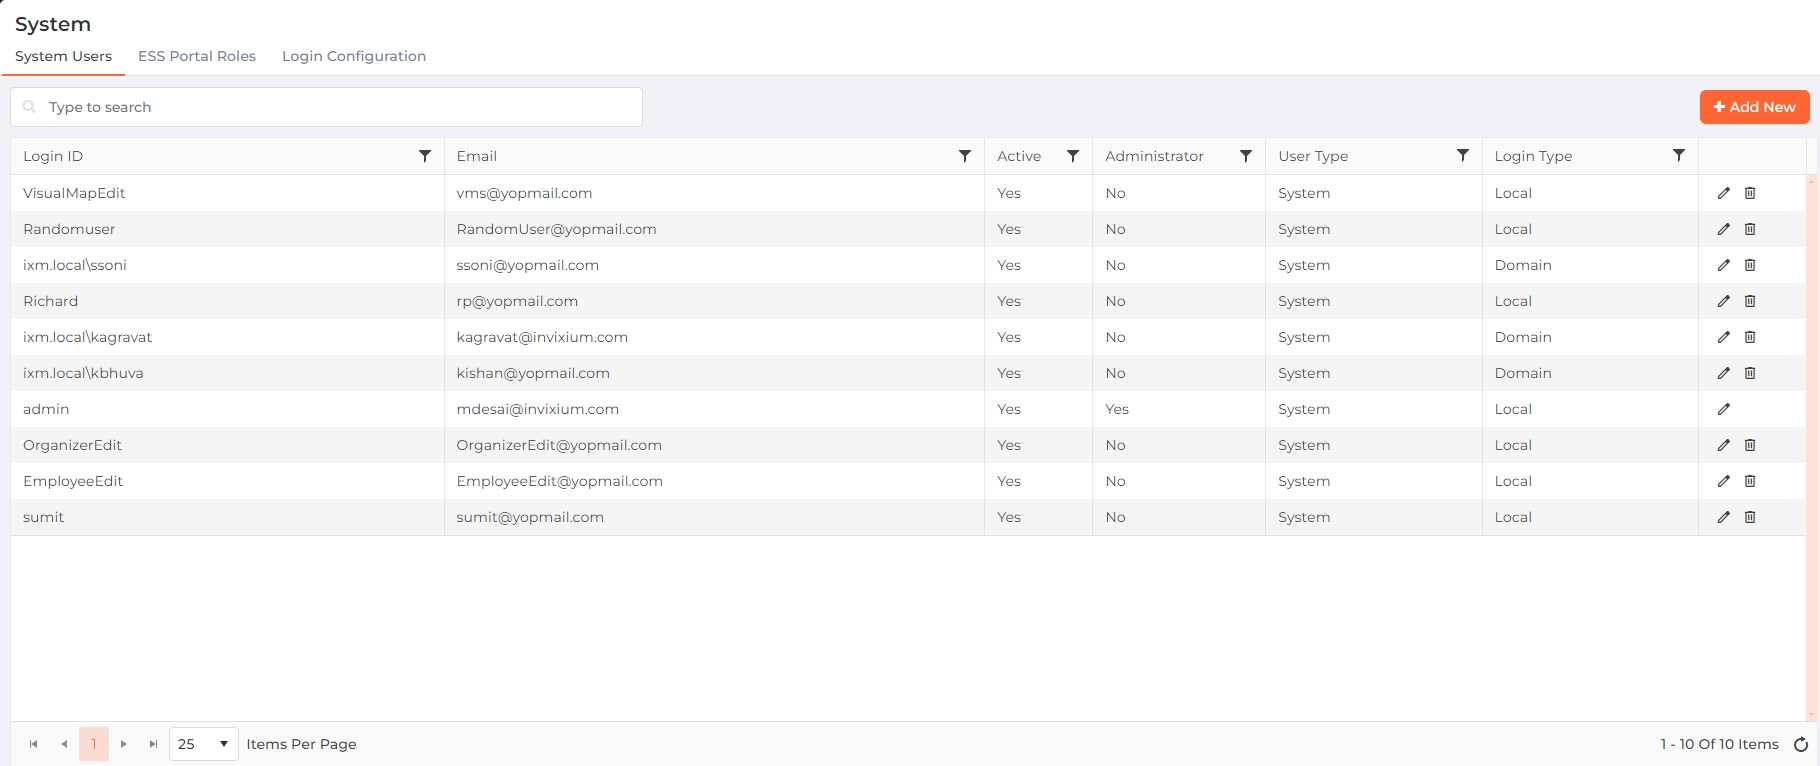
Managing the rights or privileges by assigning permissions to users is essential when different tasks are distributed to multiple users.
|
NOTE An Admin user will be created automatically once IXM WEB is installed. You can not delete an Admin user or edit details of Admin user except Password and Email ID.
|
The following four types of users can be created in IXM WEB:
-
System
-
API
-
Security Portal
-
Receptionist
Field Description of System Users
A list of already defined users including the Admin will be displayed.
Search:
You can search for a particular user by entering their full or partial name. Once entered, either press <Enter> key or click on Search button. The list will be refreshed with a list of System Users matching with the entered name.
To add a new System User, click on the  button in the top right corner of the screen.
To edit a System User, click on ![]() icon in the last column of the user list.
icon in the last column of the user list.
The page is divided into two tabs: Profile and User Rights to save respective information.
Screen Layout of Profile
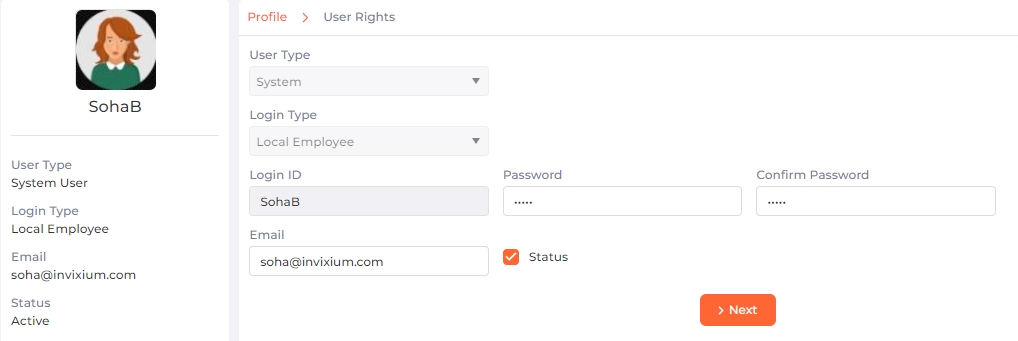
Field Description of Profile
User Type:
While adding a new System User, select "System" from the dropdown list.
While editing a System User, User Type cannot be changed.
Login Type:
Denotes the Login Type of the System User.
In IXM WEB, there are three types of System User log-ins:
-
Local Employee
-
Domain Employee
-
Azure Employee
The first application administrator is always a local user. For the rest of the system and ESS, users can be a local user, domain user, or Azure user.
|
NOTE Prerequisites for Active Directory Users are as follows:
|
While adding a new System User, select the Login Type as "Local Employee" or "Domain Employee" from the dropdown list.
While editing a System User, Login Type cannot be changed.
Users:

|
This option will be displayed only when Login Type is selected as "Domain Employee". |
Click on the checkbox to access a list of Domains and its Users. Select the appropriate Domain and User for the Employee from the dropdown list.
Login ID:
Denotes the Invixium ID of the System User. This is the ID that will be used to log-in to IXM WEB.
While adding a new System User, enter the ID.
|
NOTE
|
While editing a System User, the value of this field can not be changed
Password:

|
This option will be displayed only when Login Type is selected as "Local Employee". |
Enter the Password for the login ID.
Confirm Password:

|
This option will be displayed only when Login Type is selected as "Local Employee". |
Re-enter the Password to confirm it.
Email:
Enter the Email Id of the System User.
|
NOTE In case the User has forgotten the Password, the application will allow to reset the Password by sending email on this email ID. But prior to that, it is mandatory to configure Email settings from System Settings >> System Notifications >> Email Configuration option.
|
Status
Click on the checkbox to activate or deactivate the User. A check mark in the box indicates that the User is active.
SSO Login

|
This option will be displayed only when Login Type is selected as "Domain Employee". |
Denotes whether the credentials can be used as Single Sign-On or not.
Click on the box to enable or disable the feature. A check mark in the box indicates the Employee can use the log-in credential to authenticate with multiple applications and websites.
Once entered, click on the Next button to assign rights and permissions to the user.
Screen Layout of User Rights
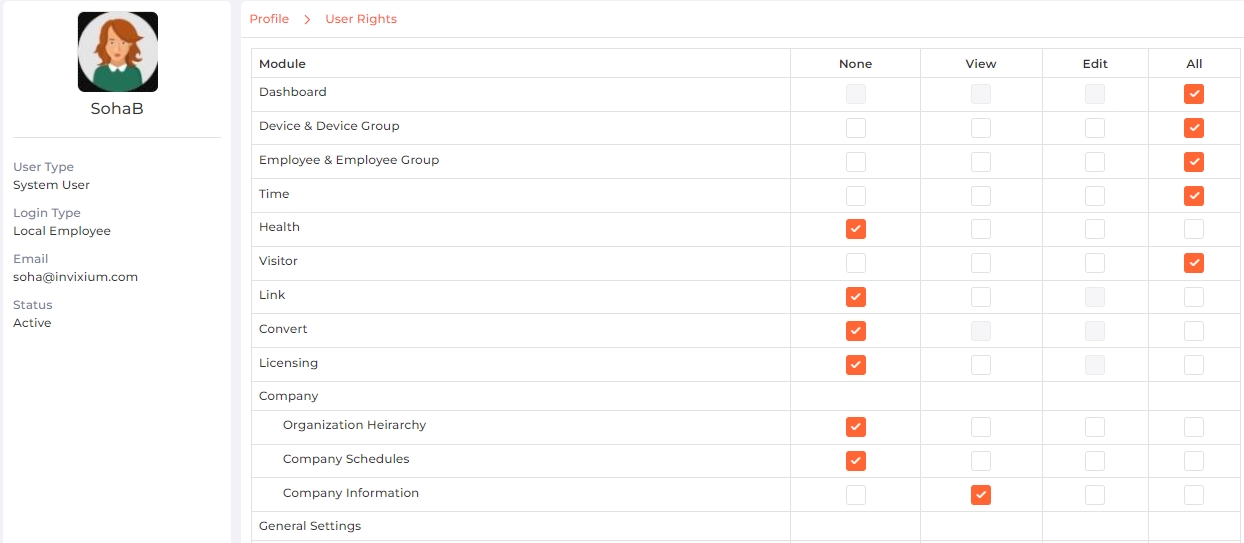
Field Description of User Rights

|
Admin User is given all rights and can not be changed. |
Click on None checkbox to restrict permission to the module.
Click on View checkbox to give viewing rights of the module.
Click on Edit checkbox to give editing rights of the module.
Click on All checkbox to give all rights of the module.
Click on the Save button to save the System User. Click on the Previous button to go back to the previous page.
|
NOTE
If the Login Type is selected as "Azure Employee" and the Azure Employee is created, the Forms Authentication should be disabled. There are two ways to do so:
Once these steps are complete, the Azure AD button will be visible on the IXM WEB login page as follows: |
|
|
API Users are those who have access to APIs within the IXM WEB application.
To add a new API User, click on the  button in the top right corner of the screen.
To edit an API User, click on ![]() icon in the last column of the user list.
icon in the last column of the user list.
Screen Layout of Profile

Field Description of Profile
User Type:
While adding a new API User, select "API" from the dropdown list.
While editing an API User, User Type cannot be changed.
Login ID:
Denotes the Invixium ID of the API User. This is the ID that will be used to log-in to IXM WEB.
While adding a new API User, enter the ID.

|
The username must be 5 characters or more. Only alphabets, digits, spaces, and following special characters [. _ \] are allowed. |
While editing an API User, the value of this field can not be changed
Password:
Enter the Password for the login ID.
|
NOTE If the User needs to change their Password, they need to contact the Administrator.
|
Confirm Password:
Re-enter the Password to confirm it.
Email:
Enter the Email Id of the API User.
|
NOTE In case the User has forgotten the Password, the application will allow to reset the Password by sending email on this email ID. But prior to that, it is mandatory to configure Email settings from System Settings >> System Notifications >> Email Configuration option.
|
Status
Click on the checkbox to activate or deactivate the user. A check mark in the box indicates that the user is active.
Click on the Save button to save the API User.
|
NOTE A Security Portal User can be created only if IXM Visitors license is purchased.
|
A Security Portal User is the one who can log-in to Visitor Management System (VMS) Portal and allow entry to the visitors.
To add a new Security Portal User, click on the  button in the top right corner of the screen.
To edit a Security Portal User, click on ![]() icon in the last column of the user list.
icon in the last column of the user list.
The page is divided into two tabs: Profile and User Rights to save respective information.
Screen Layout of Profile

Field Description of Profile
User Type:
While adding a new API User, select "Security Portal" from the dropdown list.
While editing an API User, User Type cannot be changed.
Login ID:
Denotes the Invixium ID of the API User. This is the ID that will be used to log-in to IXM WEB.
While adding a new API User, enter the ID.

|
The username must be 5 characters or more. Only alphabets, digits, spaces, and following special characters [. _ \] are allowed. |
While editing an API User, the value of this field can not be changed
Password:
Enter the Password for the login ID.
Confirm Password:
Re-enter the Password to confirm it.
Email:
Enter the Email Id of the API User.
|
NOTE In case the User has forgotten the Password, the application will allow to reset the Password by sending email on this email ID. But prior to that, it is mandatory to configure Email settings from System Settings >> System Notifications >> Email Configuration option.
|
Status
Click on the checkbox to activate or deactivate the user. A check mark in the box indicates that the user is active.
Once entered, click on the Next button to assign rights and permissions to the user.
Screen Layout of User Rights
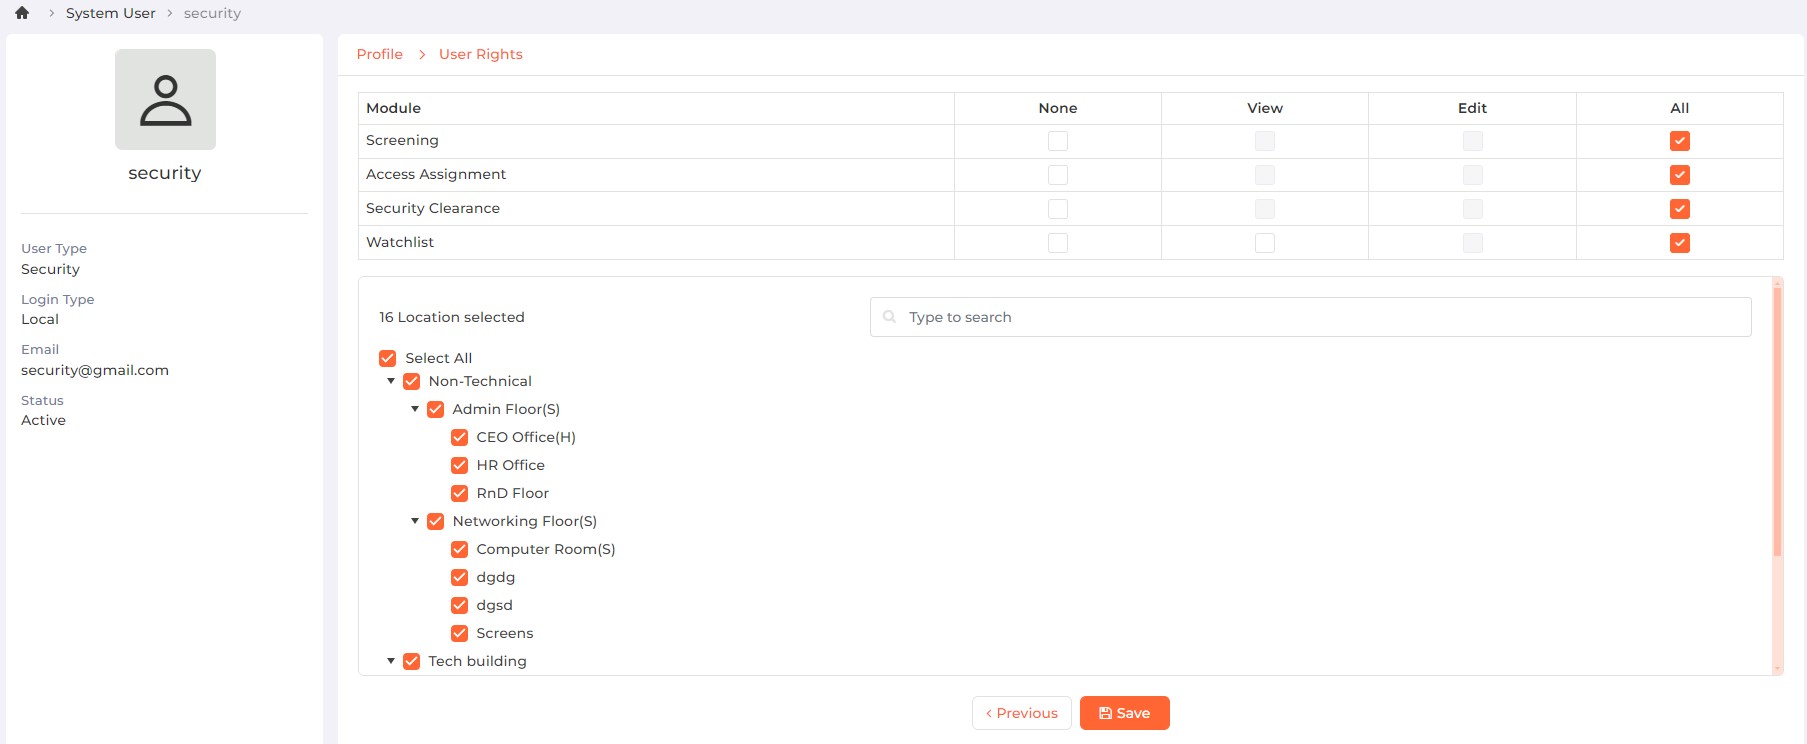
Field Description of User Rights
Click on None checkbox to restrict permission to the module.
Click on View checkbox to give viewing rights of the module.
Click on Edit checkbox to give editing rights of the module.
Click on All checkbox to give all rights of the module.
Similarly, you can also assign rights for Locations that can be accessed by the security personnel. A list of Locations defined for the company from the Visitor >> Configuration >> Location section is displayed. Check the respective location boxes to provide access. Unchecked locations will not be accessible to the Security Portal User.
Click on the Save button to save the Security User. Click on the Previous button to go back to the previous page.
To add a new Receptionist User, click on the  button in the top right corner of the screen.
To edit a Receptionist User, click on ![]() icon in the last column of the user list.
icon in the last column of the user list.
The page is divided into two tabs: Profile and User Rights to save respective information.
Screen Layout of Profile

Field Description of Profile
User Type:
While adding a new System User, select "Receptionist" from the dropdown list.
While editing a System User, User Type cannot be changed.
Login Type:
Denotes the Login Type of the Receptionist User.
In IXM WEB, there are three types of Receptionist User log-ins:
-
Local Employee
-
Domain Employee
-
Azure Employee
The first application administrator is always a local user. For the rest of the system and ESS, users can be a local user or domain user.
|
NOTE Prerequisites for Active Directory Users are as follows:
|
While adding a new Receptionist User, select the Login Type as "Local Employee", "Domain Employee", or "Azure Employee" from the dropdown list.
While editing a System User, Login Type cannot be changed.
Domain Employee:

|
This option will be displayed only when Login Type is selected as "Domain Employee". |
Click on the checkbox to access a list of Domains and its Users. Select the appropriate Domain and User for the Employee from the dropdown list.
Login ID:
Denotes the Invixium ID of the Receptionist User. This is the ID that will be used to log-in to IXM WEB.
While adding a new Receptionist User, enter the ID.

|
The username must be 5 characters or more. Only alphabets, digits, spaces, and following special characters [. _ \] are allowed. |
While editing a Receptionist User, the value of this field can not be changed
Password:

|
This option will be displayed only when Login Type is selected as "Local Employee". |
Enter the Password for the login ID.
Confirm Password:

|
This option will be displayed only when Login Type is selected as "Local Employee". |
Re-enter the Password to confirm it.
Email:
Enter the Email Id of the Receptionist User.
|
NOTE In case the User has forgotten the Password, the application will allow to reset the Password by sending email on this email ID. But prior to that, it is mandatory to configure Email settings from System Settings >> System Notifications >> Email Configuration option.
|
Status
Click on the checkbox to activate or deactivate the User. A check mark in the box indicates that the User is active.
SSO Login

|
This option will be displayed only when Login Type is selected as "Domain Employee". |
Denotes whether the credentials can be used as Single Sign-On or not.
Click on the box to enable or disable the feature. A check mark in the box indicates the Employee can use the log-in credential to authenticate with multiple applications and websites.
Once entered, click on the Next button to assign rights and permissions to the user.
Screen Layout of User Rights
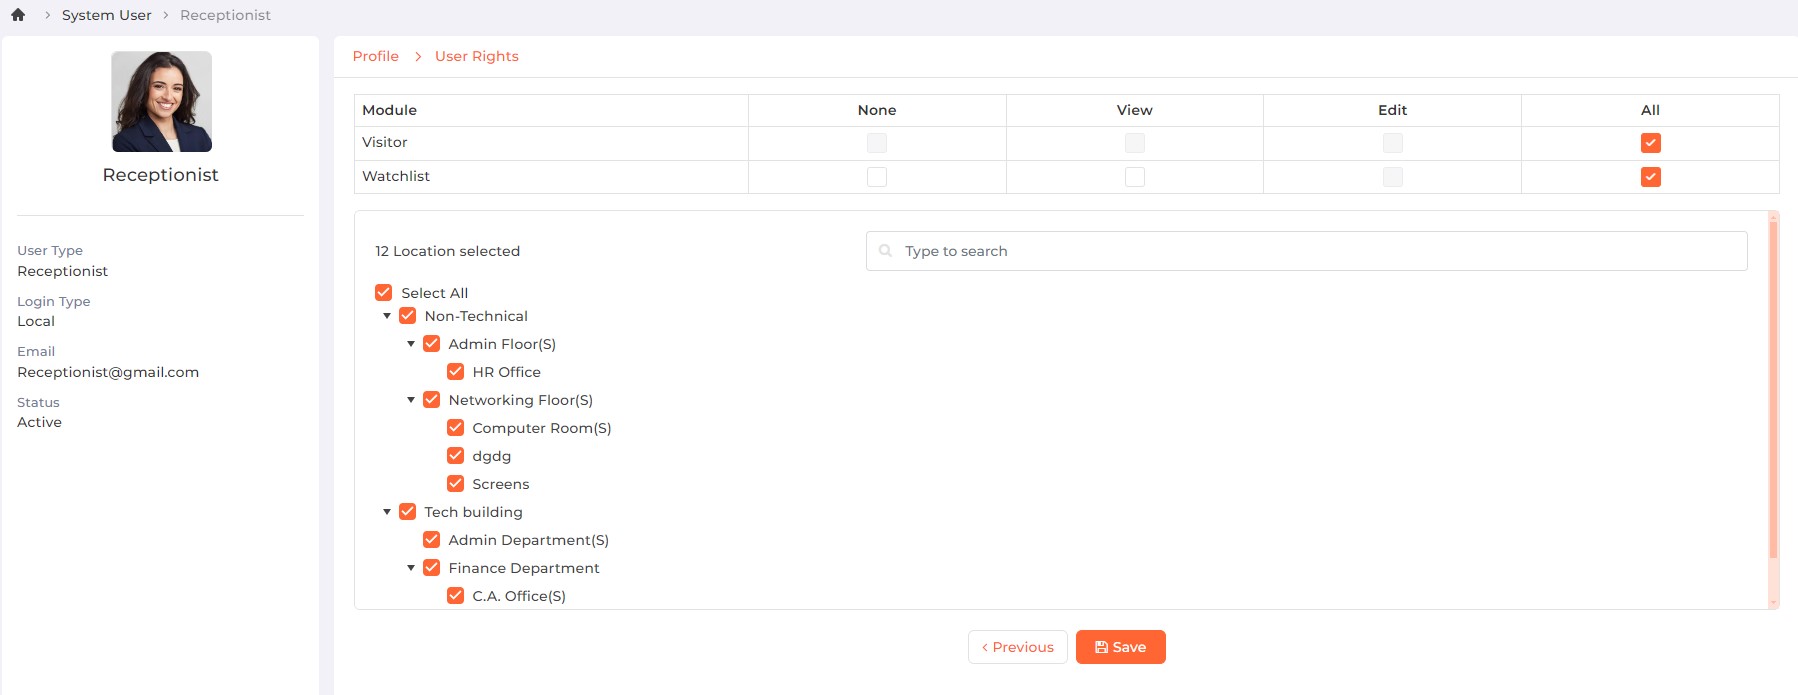
Field Description of User Rights
Click on None checkbox to restrict permission to the module.
Click on View checkbox to give viewing rights of the module.
Click on Edit checkbox to give editing rights of the module.
Click on All checkbox to give all rights of the module.
Similarly, you can also assign rights for Locations that can be accessed by the Receptionist User. A list of Locations defined for the company from the Visitor >> Configuration >> Location section is displayed. Check the respective location boxes to provide access. Unchecked locations will not be accessible to the Receptionist User.
Click on the Save button to save the Receptionist User. Click on the Previous button to go back to the previous page.
You can add or change profile picture of a user by clicking on the ![]() icon on the image. IXM WEB provides three ways to add a profile picture -
icon on the image. IXM WEB provides three ways to add a profile picture -
-
Select file
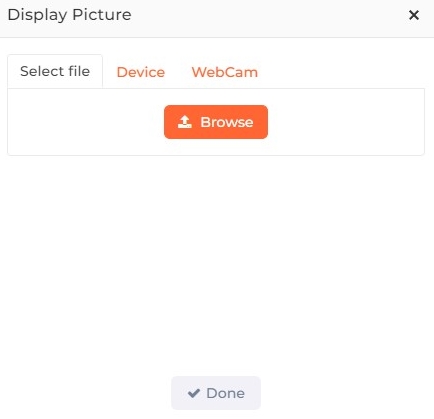
Click on Browse button to select an image file from its respective path.
-
Device
Capture the image by using Device camera.
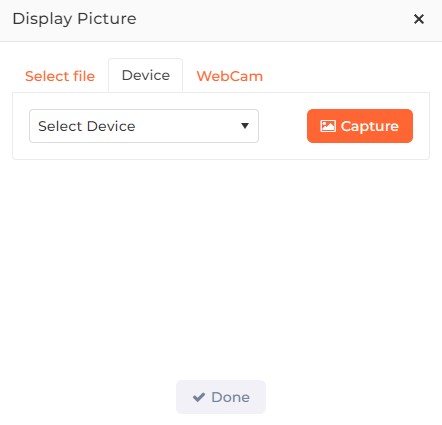
Select Device:
Select the Device on which image has to be captured.
Click on Capture button to capture the image. The selected Device should be online.
-
WebCam
Capture the image by using WebCam.
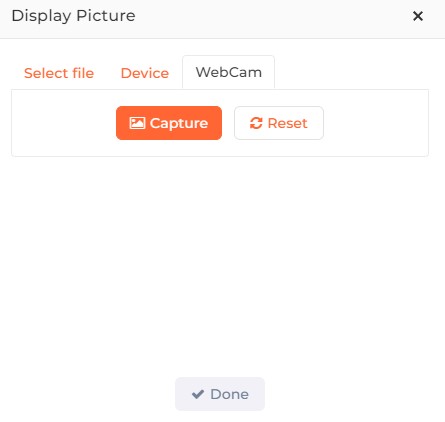
Click on Capture button to capture the image.
Once the image is selected, click on Done button. The selected image will be displayed as profile picture of the User.
Click on the ![]() icon in the last column of the user list to delete the user. The application will ask for confirmation as follows -
icon in the last column of the user list to delete the user. The application will ask for confirmation as follows -
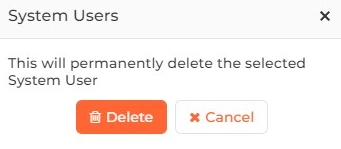
Click on Delete button to delete the selected user. It will also be removed from the list. Click on Cancel button to discard the action.
Screen Layout of ESS Portal Roles
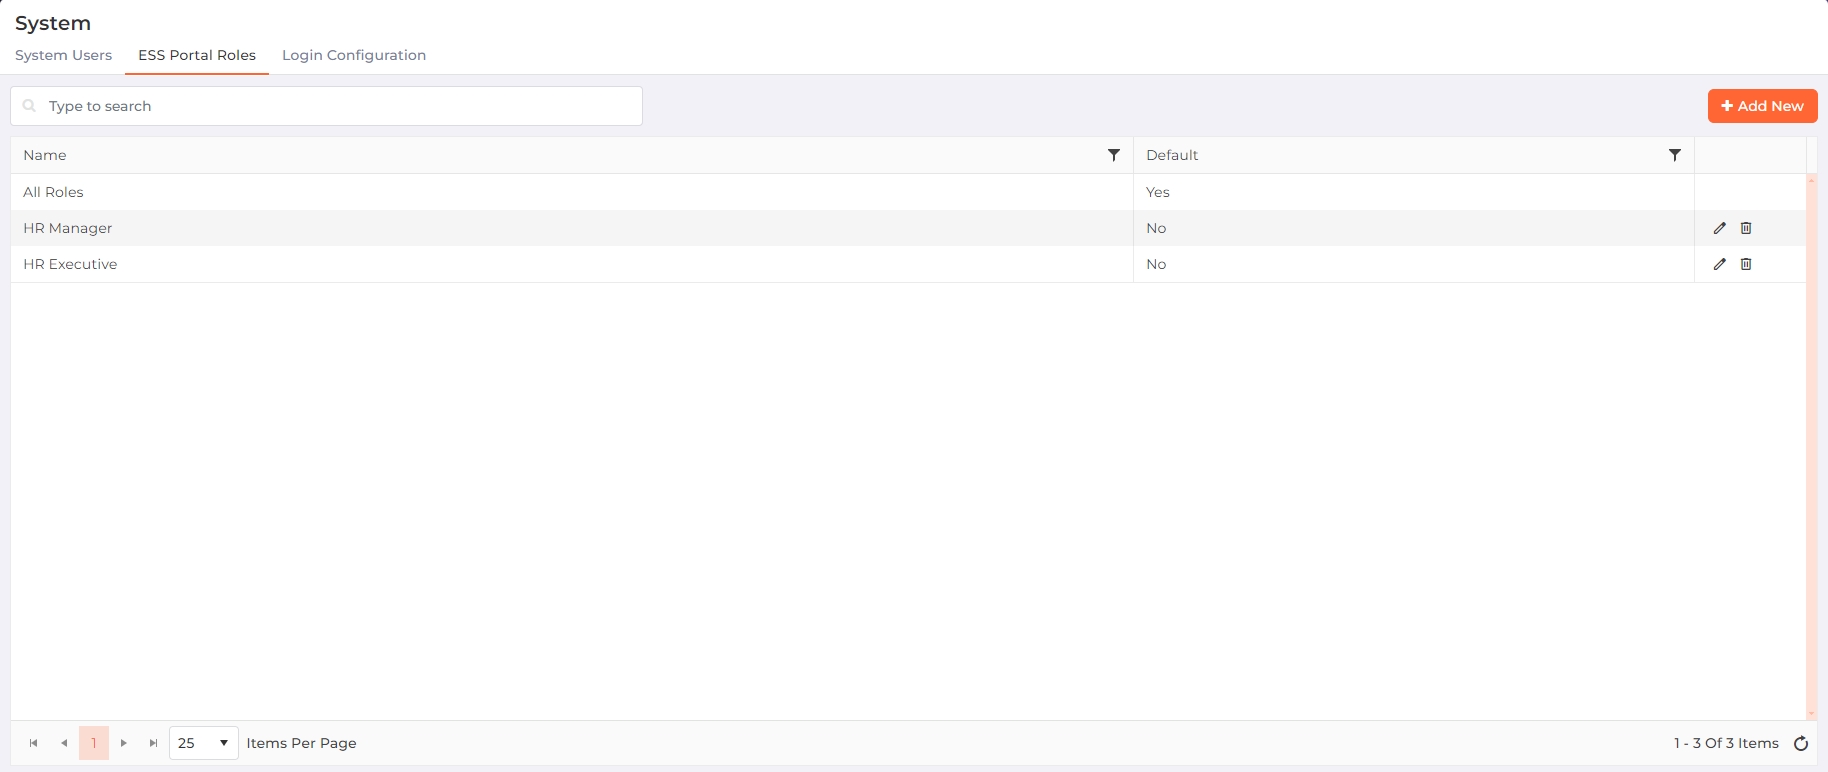
Field Description of ESS Portal Roles
Use this section to create and manage Employee self-service (ESS) Portal roles and their associated rights or privileges. These ESS roles are then assigned to users, allowing them to access the Time and Attendance module according to their specific role permissions.
Each ESS Role can be considered either as an Employee or a Manager and rights can be assigned accordingly.
A list of existing Roles will be displayed. By default, "All Roles" will be created automatically.
Search:
You can search for a particular Role by entering their full or partial name. Once entered, either press <Enter> key or click on Search button. The list will be refreshed with a list of Rules matching with the entered name.
To add a new ESS Portal Role, click on the  button in the top right corner of the screen.
To edit a ESS Portal Role, click on ![]() icon in the last column of the role list.
icon in the last column of the role list.
The following screen is displayed:
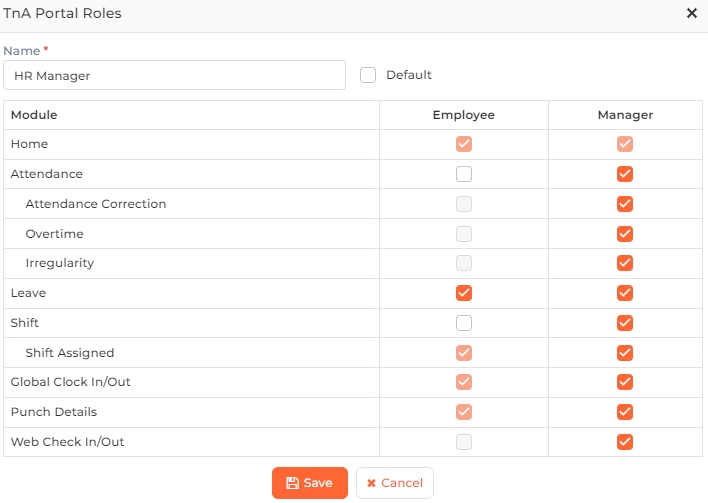
Name:
Enter the name of the ESS Portal Role.
Default
Check the box to set the ESS Portal Roles as a default role. Or else, keep the box unchecked.
Next, a list of Modules within the ESS Portal will be displayed with separate columns for Employee and Manager.
Check the boxes under the Employee column to grant access rights to the corresponding modules for users in this role.
Similarly, check the boxes under the Manager column to grant access rights to the corresponding modules, providing managerial access to users in this role.
Click on the Save button to save the ESS Portal Role or on the Cancel button to discard the action.
Click on the ![]() icon in the last column of the ESS Portal Role list to delete the role. The application will ask for confirmation as follows -
icon in the last column of the ESS Portal Role list to delete the role. The application will ask for confirmation as follows -

Click on Delete button to delete the selected Role. It will also be removed from the list. Click on Cancel button to discard the action.
Screen Layout of Login Configuration

Field Description of Login Configuration
This section helps you to configure Login settings as follows:
Set the Password Policy as follows:
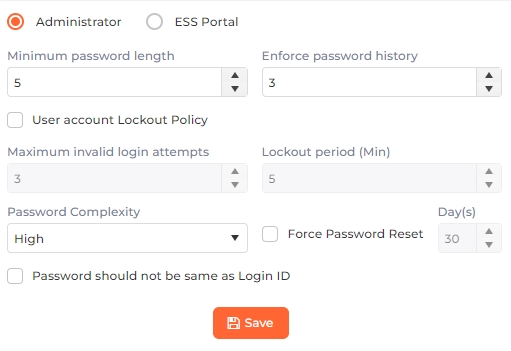
Administrator
Select this option by clicking on it if you want to set Password Policy for the Administrator login.
ESS Portal
Select this option by clicking on it if you want to set Password Policy for the Employee Self-Service (ESS) portal login.
Minimum password length:
Specify the minimum number of characters for the password. It can not be less than 5 characters.
Enforce password history:
Specify the number of previous passwords that should not match with the new password. The minimum and default number of previous passwords is 3 and the maximum is 100.
User account Lockout Policy
Click on the checkbox to enable or disable this feature. Enabling this feature will enforce lockout policy in case of invalid login attempts as follows:
Maximum invalid login attempts:
Specify the number of maximum invalid login attempts that a user can make. The minimum and default number of attempts is 3 and the maximum is 100.
Lockout period (Min):
Enter the period of lockout in minutes. The minimum time period is 1 minute and the maximum is 100 minutes. This is the time period a user must wait before logging back into IXM WEB after logging out.
Password Complexity:
Specify the level of complexity of the password. IXM WEB allows the following three levels:
| Complexity Level | Rule | Example |
| Low | Any characters | password |
| Medium | 1 Numeric is required | password1 |
| High (default) |
1 Uppercase 1 Lowercase 1 Numeric 1 Special character |
Password@1 |
Force Password Reset
Click on the checkbox to enable or disable this feature. Enabling this feature will force the user to change their password after specified number of days as follows:
Days:
Specify the number of days in which the user must change their password. The minimum and default number of days is 30 and the maximum number of days is 365.
Password should not be same as Login ID
Click on the checkbox to enable or disable this feature.
If this feature is enabled, the password can not be the same as the Login ID.
If this feature is disabled, the password can be the same as the Login ID.
After entering all the details, click on the Save button to save the Password Policy.
|
NOTE It is a prerequisite to have an Azure account to use IXM WEB from Azure portal.
|
The following options will be displayed to configure the Azure Login:

Client Id:
Enter the Azure Client or Application Id.
Tenant Id:
Enter the Azure Tenant or Directory Id.
Redirect URL:
Enter the Azure URL of IXM WEB.
Once entered, click on APPLY button to save and apply the settings.
|
NOTE After applying the settings, it is mandatory to refresh IXM WEB to activate them.
|
Specify the authentication type required to log in to IXM WEB.

Authentication Type:
Select "SSO Login" from the dropdown list to log in to IXM WEB using SSO login.
Select "Azure Login" from the dropdown list to log in to IXM WEB using Azure login.
Once entered, click on APPLY button to save and apply the settings.
|
NOTE
|
Specify the rules for login restriction as follows:
Prevent Concurrent Logins
Click on the checkbox to enable or disable the feature. A check mark in the box indicates the feature is enabled.
Enabling this feature will prevent a user from logging in to IXM WEB from multiple devices or sessions at the same time.
Disabling this feature will allow the user to log into IXM WEB from multiple devices or sessions simultaneously.
Captcha
Click on the checkbox to enable or disable the feature. A check mark in the box indicates the feature is enabled.
Enabling this feature adds an additional layer of security. Users will be required to enter a Captcha when logging into the IXM WEB.
Disabling this feature will remove the Captcha requirement during login.


